Rubber fenders, also known as rubber bumpers, are mainly installed on docks or ships to absorb the collision energy between ships and docks or ships when docking or mooring, and to protect ships and docks from damage. . But as a kind of rubber elastic body, the fender will inevitably suffer some damage during long-term use. At this time, correct replacement and installation can effectively avoid leaving safety hazards and give full play to its value.
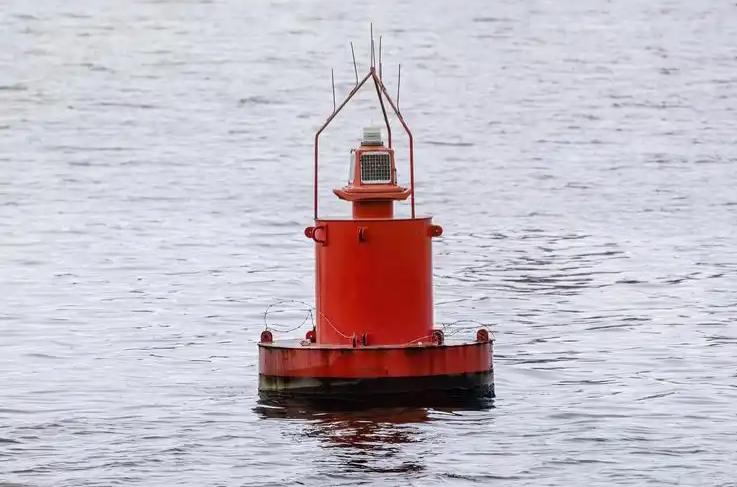
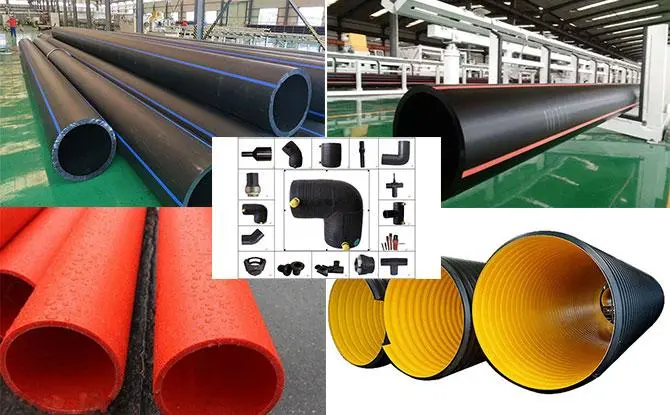
Usually, rubber fenders can be divided into 2 categories according to the structure: solid rubber fenders (non-floating type) and floating rubber fenders. Solid rubber fender is more widely used, so this article will mainly talk about its replacement and installation-related matters.
Installation Preparation
Before doing any replacement and installation work, it is important to make sure you have all the necessary materials and tools you need for the job.
1. The materials you need
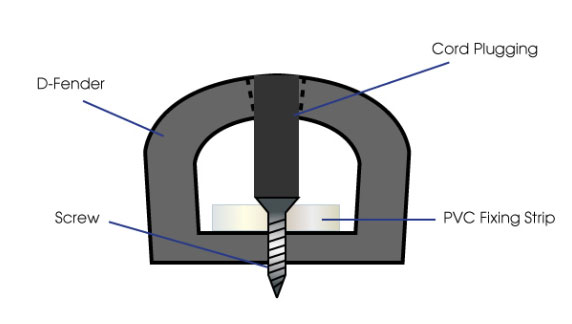
- New rubber fenders (here take D-type fenders as an example)
- Rigid PVC fixing strip
- Marine grade adhesive
- Waterproof sealant
- Stainless steel screws/bolts
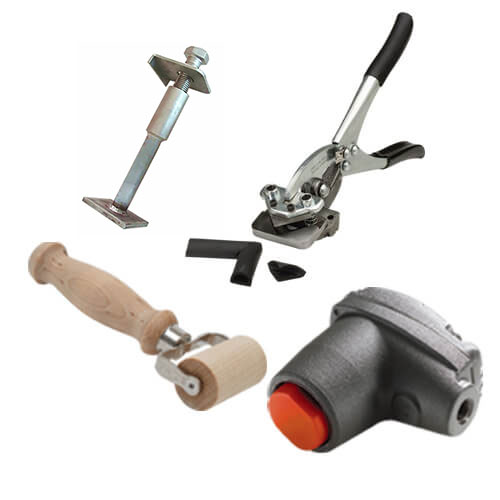
2. The tools you need
- Tape measure
- Screwdriver/wrench/socket worker
- Electric drill
- Sealant glue gun
- Special round brush
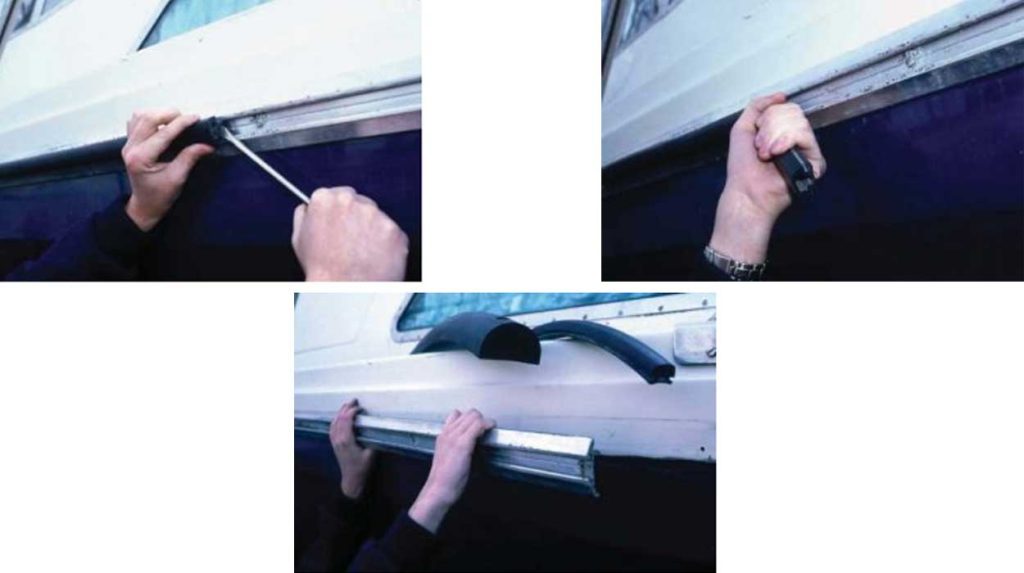
Removal of The Original Damaged Rubber Fender
- When removing the original rubber fender, avoid damage to the original structural parts. If there is any damage, the concrete structure should be repaired before the new rubber fender can be installed.
- Carefully clean up the original embedded nuts of the rubber fender, and there must be no sundries and oil stains that affect the installation in the nuts. If the nut has been severely damaged, the nut should be repaired, and the repair is mainly carried out by replanting the bolt.
Construction Requirements for Installing Rubber Fenders
- Purchasing and installing fenders according to the requirements of the design drawings and technical specifications. The material, structure and energy absorption characteristic curve of the fenders should have the manufacturer’s certificate.
- Before installing the fender and gangway, check the shape, size, material, and performance of the fender to ensure that it meets the requirements of the technical specification, and check whether the installation position and elevation of the embedded parts and embedded bolts are accurate.
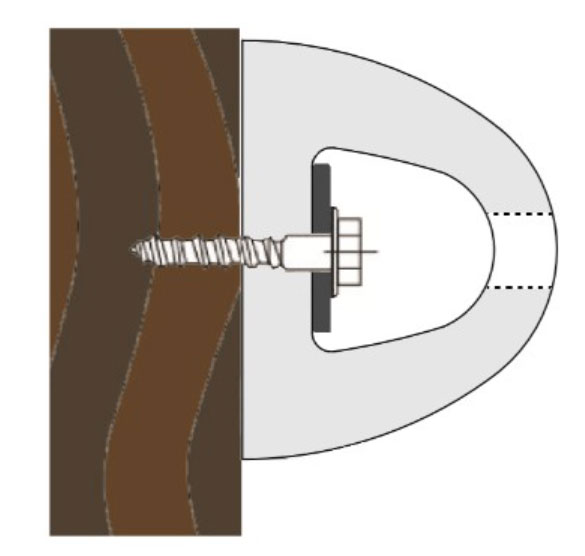
- During installation, the rubber fender must be tightly in contact with the wharf. The nuts fixing the fender are fully screwed, the top of the bolt is indented into the fender, and the embedded depth of the bolt meets the requirements of the drawings and manufacturer’s instructions. The exposed iron parts must be removed. rust, and then use anti-rust paint for protection, and the quality inspection of rubber fenders and gangways shall be carried out in accordance with relevant standards.
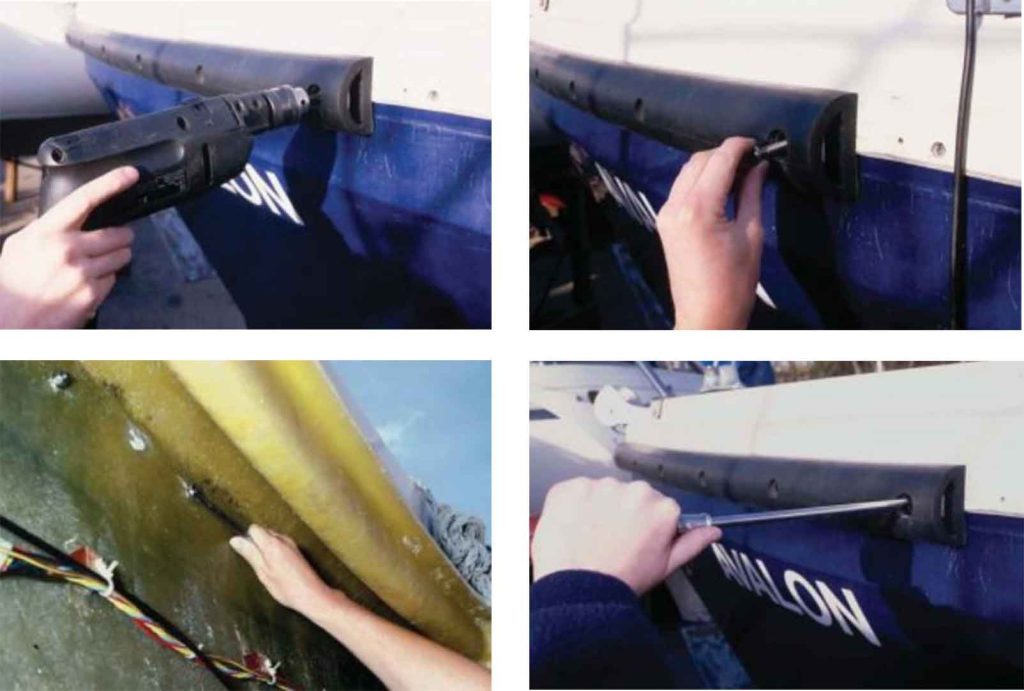
7 Steps to Install The New Rubber Fender
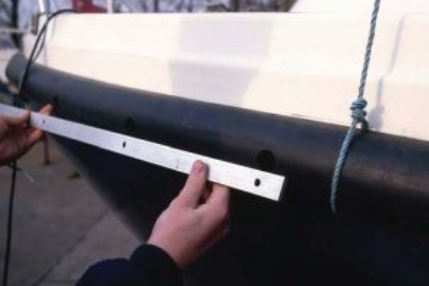
1. Measurement and positioning
The installer has determined the relevant dimension lines of the D-type fender. When drilling the D-type fender, the processed positioning plate should be fixed with expansion bolts according to the relevant dimensions.
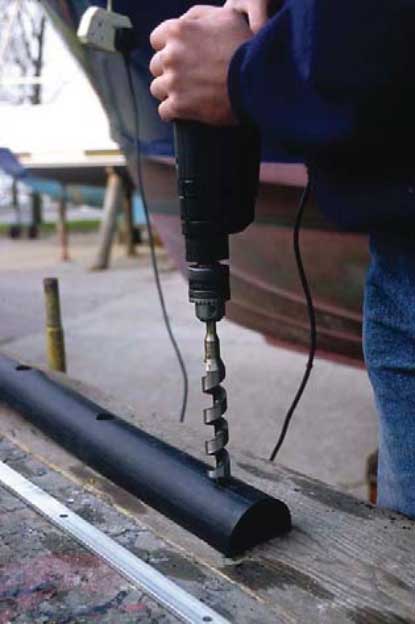
2. Drilling
Electric drill, sealant gun, screwdriver and necessary protective equipment such as gloves and mask are necessary for drilling. According to the requirements of the project, choose the corresponding specifications of the drill pipe, the length of the drill pipe should be able to meet the requirements of the drilling design depth, construction to avoid the location of the reinforcement in the substrate, mark out the drilling location, the drilling location should be correct, hole spacing according to the regulations and design requirements, the hole should be dry, otherwise it should be artificially dry treatment, to ensure that the protection porthole bolts and concrete bonding and curing before the absolute dry.
3. Cleaning hole with brush
After the hole is formed, the dust in the hole must be removed with an air compressor and a special round brush to avoid affecting the bonding surface due to dust isolation. First use an air compressor to blow it a few times, and then use a brush to clean the hole back and forth until there is no dust.
4. Cleaning hole with acetone
Clean the surrounding walls of the concrete tunnel with a brush dipped in acetone to ensure good bonding between the substrate hole wall and the structural adhesive. After the acetone volatilizes, put a paper plug on the tunnel opening in time to avoid contamination and wait for use.
5. Glue adjustment
The optimal construction temperature of structural adhesive is 15°C~25°C. According to the change of construction temperature, the amount of curing agent can be appropriately increased or decreased through experiments. Precise measuring instruments should be used for glue dispensing, such as balances and platform scales less than 5kg, the glue should be called first, and the curing agent should be called later. After the two-component resin glue is weighed and mixed, it should be stirred evenly. The dosage should not be too much at one time, so as not to affect the bonding quality of the construction after the glue deteriorates after a long time. Generally, the structural glue prepared at one time should be within 30min~40min. All used up.
6. Hole injection glue
Depending on the application form of the anchoring glue (tube-packed, mechanical injection, on-site preparation as above) and direction (upward, downward, horizontal) use the corresponding glue injection method. Glue injection can be used to fill the hole with a viscose perfusion device or other methods. Be sure to fill the hole and remove the air so that the colloid accounts for more than 80% of the hole volume.
7. Insert the screw
Immediately insert the screw after injecting the structural glue, and turn the screw properly to remove the air between the glue and the screw, and combine the glue evenly. Clean up the excess structural glue at the orifice, and set up a temporary support for the longer screw rod before the anchor is solidified to prevent displacement; the completed screw rod should be statically cured and maintained for Id ~ 3d, and disturbance is prohibited during curing.